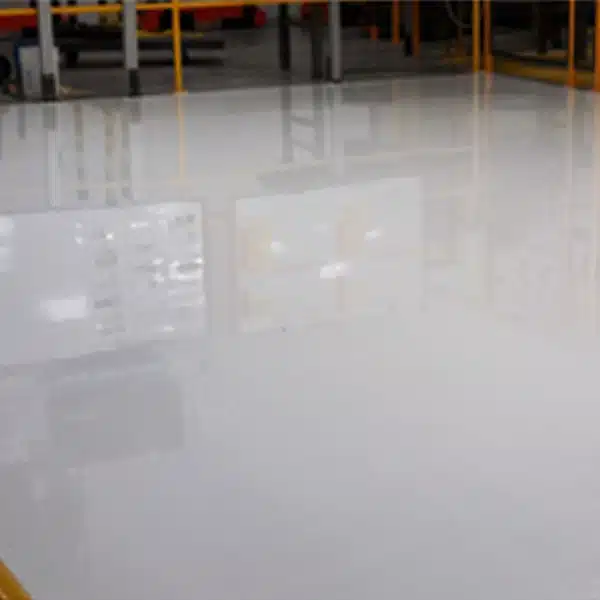
EPOXY POLY SOLID COLOR
A solid color system with our tried and true 100% solids epoxy, Epoxy Flow 100 as a base coat, and UV-stable Poly 90/85 as a topcoat. Creating a thicker, smoother floor. Available in slow set options for extended work times during installation.
EPOXY POLY SOLID COLOR SYSTEM BENEFITS AND CHARACTERISTICS
EPOXY POLY SOLID COLOR SYSTEM BENEFITS AND CHARACTERISTICS

SCRATCH & SCUFF RESISTANT

LOW ODER

LONG WORK TIME

CHEMICAL RESISTANT

INTERIOR

HOT TIRE RESISTANT
CROSS SECTION LAYER

- Basecoat Epoxy Flow 100 (reg or slow) @ 150 sqft/gal
- Topcoat = Poly 90/85 Slow @ 250 sqft/gal
Step-by-Step Installation of Epoxy Poly Solid Color Instructions
Pre-Application Assessment & Preparation
A. Moisture Testing
- Initial Screening (Plastic Sheet Test):
- Place a 4′ x 4′ plastic sheet on the concrete surface.
- Securely tape all edges.
- Inspect for moisture after 24 hours.
- If dry, proceed to coating (with caution).
- If moisture is present, advance to more rigorous testing.
- Advanced Moisture Testing (If Moisture Detected):
- Perform calcium chloride testing.
- Perform relative humidity probe testing.
- Determine if vapor emissions exceed acceptable levels.
B. Surface Preparation
- Concrete Condition:
- Ensure concrete is mechanically and structurally sound.
- Ensure concrete is thoroughly clean and dry.
- Ensure concrete is fully cured (minimum 28 days).
- Mechanical Preparation (Recommended):
- Shot blasting or diamond grinding (30 grit or coarser).
- Target CSP-2 to CSP-3 profile.
- Vacuum thoroughly to remove dust.
C. Existing Coating Preparation (If Applicable):
- Thoroughly sand with a60-120 grit sanding screen(dull surface).
- Vacuum dust and wipe with dry microfiber.
- Use acetone on microfiber to remove remaining dust (PPE required).
- If wet cleaning, allow 24 hours for the cleaning to dry completely.
D. Check Environmental Conditions
- Temperature: Substrate, air, and material temperatures: 50°F to 80°F. Avoid application outside these limits (film formation issues).
- Humidity: Cooler temperatures and lower humidity may slow the cure rate of this product.
E. Personal Protective Equipment (PPE):
- Gloves, goggles, respirator, and other necessary PPE.
F. Refer to the Safety Data Sheet (SDS) before use.
2. Material Preparation
A. Tinting (If Applicable):
B. Epoxy Pigment:
-
- Use epoxy pigment for tinting.
- Suggested ratios:
- Solid opaque finish: One pint per 3-gallon kit.
- Metallic finish: One quart per 3-gallon kit.
- Add color to Part A and drill mix for 2-3 minutes.
- Test color acceptance before full application.
- Multiple coats may be required for opacity.
- Refer to the color chart for selection.
C. Mixing (General):
-
- Mix Part A and Part B of Epoxy Flow separately before combining.
- Use a stir stick, low-speed mixer, or vigorous shaking.
- Blend 2 parts A with 1 part B using a drill mixer for 2-3 minutes.
- Use Part A container for mixing for full kits (except 15-gallon).
- Avoid creating a vortex (air/moisture introduction).
- Mix only what can be applied within pot life.
- Do not thin the product.
3. Application: Pouring and Spreading Epoxy
A. Immediate Application:
-
- Pour mixed material onto the surface immediately.
- Do not leave mixed products in the bucket.
B. Spreading Technique:
-
- Use a flat, flexible, or notched squeegee (blue notched is recommended for direct concrete application).
- Back roll with 3/8” nap shedless or foam roller (18” rollers recommended).
C. Metallic Applications: Refer to the metallic pigment datasheet for specific instructions.
D. Detail Work: Use a brush or small roller for corners and tight areas.
E. Wet Edge Maintenance: Maintain a wet edge to prevent roller marks.
F. Sectioning: Work in sections (using control joints as dividers).
G. Spiked Shoes: Use spike shoes for walking on the applied coating.
H. Pot Life Management:
- Minimize time mixed material is held in a large volume.
- Discard material thickens or sticks to tools (end of pot life).
I. Puddle Prevention: Do not allow puddling; use a brush to remove excess coating in joints.
4 Recoating Epoxy
A. Ideal Recoat Window:
-
- Recoat within the suggested recoat window (refer to product datasheet).
- Note: High temperatures and humidity shorten the recoat window.
B. Late Recoating (Outside Window/Beyond 24 Hours):
-
- Sand with 60-120 grit sanding screen.
- Vacuum dust thoroughly.
- Rinse with clean water and remove excess water.
- Allow the surface to dry completely.
- Wipe with acetone (with adequate ventilation and PPE).
- Follow all acetone safety precautions.
C. Application of Recoat: Apply recoat in the same manner as the first coat.
5 Application of Poly 90
Mix the Poly by drill mixing. (1:1) ratio
Poly should be applied by pouring the product on the floor and using a flat or small notch (5-7 mil) squeegee and immediately back rolling with a ⅜” nap, 18” roller. Dip and roll methods can also be used when the floor is saw cut into small sections that make squeegeeing prohibitive. Approximate coverage with this method is 250 sqft per gallon
- Poly 90/85 Slow hangs out in the bucket better than on the floor. Only apply the amount of product that can be effectively squeegeed and backrolled adequately at a time.
- Add traction additive if desired when mixing.
Videos of Solid Color Epoxy System:
INSTRUCTIONS
TECH SHEETS
Please Read: We do not sell the ‘finished floor’. You are responsible for creating the finished product. Please contact us with any questions. Mock ups are encouraged before doing your project. The information supplied by Concrete Floor Supply about our products and uses is not a representation or a warranty. It is supplied on the condition that you will make your own tests to determine the suitability of the product for your own particular purpose. Any use or application is the sole responsibility of the user. Listed physical properties are typical and should not be construed as specifications


