17
Oct
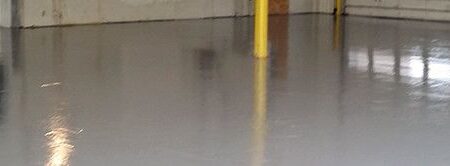
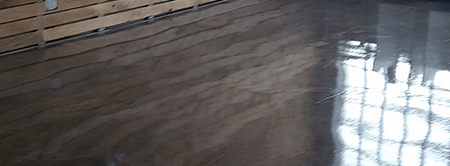
The Concrete Floor Supply Metallic System or “Metallic System” is our unique floor coating system using a pigmented epoxy base coat followed by a coating of our commercial grade epoxy system blended with metallic pigments that create a variegated, 3D appearance. The metallic coating system creates wonderful looking marbleized floors that look unbelievable that most anyone can install by utilizing our easy to use kits.
System Overview
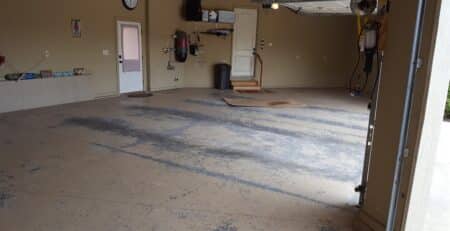
- Properly prep surface. Insure that it is clean, dry and properly profiled. Diamond grinding is the preferred method for prep. Liquid cleaners such as Super Blue can also be used as a secondary choice. Our supply shop rents diamond grinders in the Kansas City and surrounding area.
- Apply prime coat of Epoxy Flow 100, 100% solids epoxy with chosen colored epoxy pigment additive (typically black).
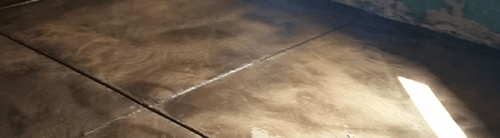
- Apply the metallic coat of Epoxy Flow 100, 100% solids epoxy mixed with Concrete Floor Supply ‘House’ metallic pigments or Torginal pigments. (Apply within 24 hours and the prime coat becomes tack free)
- Apply the topcoat using Epoxy Flow 100. (clear)(Apply within 24 hours and the metallic coat becomes tack free)
- Add Monkey Grip anti slip additive for increased traction
- Note: a primer coat using our “Moisture Mitigator” is optional, but will
- better insure moisture vapor transmissions will not come up through the coating and
- will also help in adhesion
- will minimize outgassing in subsequent coats