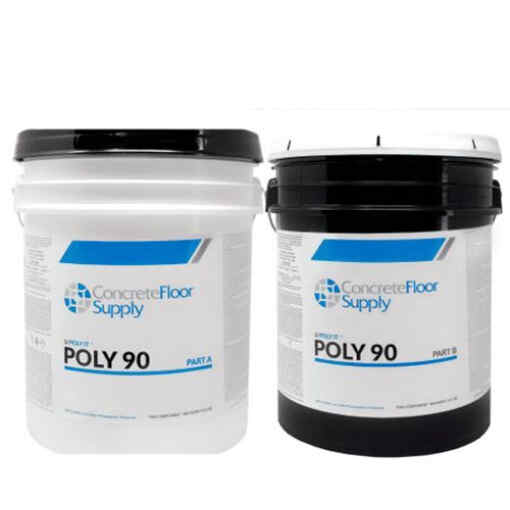
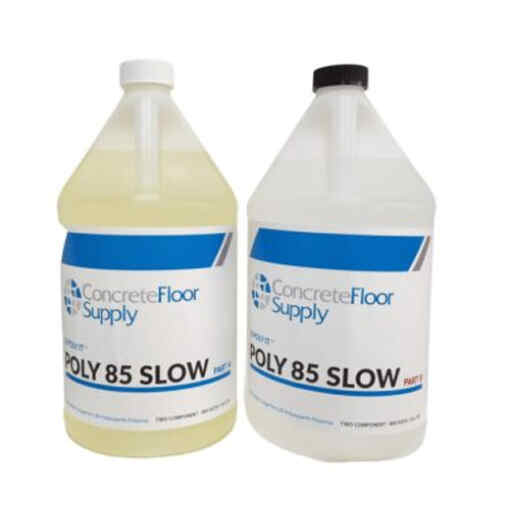
Poly 90 Low Odor Polyaspartic Coating – Our #1 liquid. Basecoat & Topcoat
$55.00 – $999.00
- Super low odor formula
- Low VOC (50 g/l)
- Long pot life, and quick return to service
- Can be tinted
- UV Stable
- The easiest coating you’ll ever use!
- Description
- Dry Times
- Data
- How To Use Poly 90
- Videos
- Polyaspartic Coating FAQs
The easiest coating you’ll ever use. With a super long pot life, Poly-90 is a low odor polyaspartic polyurea ideal for spaces where time and odor is of great concern. Poly-90 Low Odor utilizes a special blend of solvents to create a unique coating with low viscosity, a long pot life and a fast return to service. Poly-90 provides a high gloss clear coating and its superior penetration and bonding strength can provide years of abrasion, impact, and wear resistance. We are constantly told by our customers that this is the most user friendly coating product they have ever used! Can be pigmented. find pigments here
| Pot Life | 45-60 Minutes |
| Recoat or topcoats | 2-18 Hours |
| Light Foot Traffic | 4-8 Hours |
| Full Cure; Heavy Traffic | 24-48 Hours |
SURFACE PREPARATION: The concrete surface must be deemed mechanically and structurally sound, completely clean, and dry. To achieve the above desired results, a mechanical grinding or shot blast method should be performed to an achieve a 50-100 grit profile to insure flatness of the substrate, to remove surface impurities, and to profile the surface of the floor to a CSP-2, as recommended by the ICRI Technical Guideline No. 03732. AVOID USING WATER if possible. If water is used allow 48 hours before coating.
TINTING: Tint with Poly Color pigments. Use 32 oz per 4 gallons of Poly 90. Always add color to Part A and drill mix for 2 minutes prior to adding Part B. Lighter colors such as white may require 32 oz per 2 gallons. Multiple coats may be necessary for total opacity.
MIXING: If mixing less than a full kit, mix Part A & Part B separately with a stir stick, low speed mixer or vigorously shake container prior to blending the smaller kit to ensure uniform distribution of all ingredients. Proper mixing is pertinent to application success. In equal parts (1:1), mix Part A and Part B using a clean, dry mixing container. Drill mix contents approximately 1 – 3 minutes with a paddle mixer. Avoid overmixing or creating a vortex which could introduce moisture content to the mixture. No induction time is required prior to use after mixing. If integrating anti skid media agents, only do so after Parts A & B have been thoroughly mixed. Do Not Thin.
COVERAGE RATE: First Coat : 250 – 300 ft² per gallon* Optional Second Coat : 275 – 325 ft² per gallon* Over Media/Flake : 175 – 225 ft² per gallon* *Coverage rates may vary depending upon surface porosity, texture, application method and prior sealer application. Excessive build up should be avoided.
POT LIFE: Expected workable pot life (in the bucket) after mixing Part A and Part B is approximately 45 – 60 minutes at a common temperature range of 70°F – 80°F at roughly 50% relative humidity. Please note that higher temperatures and high percentages of humidity will shorten pot life, as colder temperatures and lower percentages of humidity will extend the coatings pot life. Product starts to cure quicker once it is applied to the floor.
APPLICATION INSTRUCTIONS: Over smooth surfaces: Using a brush and/or ⅜” nap shedless roller, dip and roll the mixed material from a roller pan. 18” rollers are recommended to speed up application and reduce roller marks. Roll sections at a time backing yourself out of the area and keeping a wet edge. It is recommended to work in sections using control joints as dividers. Large floors can be flat squeegeed and back rolled if desired by the installer. Apply the mixed material within the usable time frame of the pot life. Poly 90 will hang out in the bucket and start to cure quicker once it hits the floor. If the material becomes thick while applying and sticking to the roller, stop applying and discard the mixed material. At this point it has exceeded its usable pot life. Do not allow it to puddle. Use a brush to remove excess coating from joints. Over Flake Systems: Apply the mixed material by pouring directly over flake and spreading with a flat squeegee and backrolling with a ⅜” roller. Apply at approximately 175-225 sq ft per gallon. Do not allow it to puddle. Use a brush to remove excess from joints.
RECOATING: If possible recoat within the suggested recoat window. If recoating outside the suggested recoat window sand using a 60-120 grit sanding screen to ensure adequate adhesion between coats. Vacuum and dry clean thoroughly before recoating. Malish Mal-Grit brushes work well to abrade textured surfaces such as flake systems.
PLEASE NOTE: Applying material outside the suggested parameters may result in product failure. It is always recommended to test the product in a small, inconspicuous area (on the same concrete substrate) for desired results prior to application. Coverage rates may vary for all coatings and substrates depending on porosity, density, texture etc. When applying, do not exceed 400 sq. ft. per gallon. Applying too thin of a coating may cause inadequate film formation or performance expectations may be limited. DO NOT USE ON BRICK. We don’t encourage use outdoors. Increased temperatures will shorten the recoat window. Decreased temperatures will lengthen recoat window.
COF WARNING: The current coefficient of friction required by the ADA is .6 on level surfaces and .8 on ramps. Concrete Floor Supply Recommends the use of slip resistant additives if needed to meet this requirement. It is the installers responsibility to provide a flooring system that meets current safety standards.


Question: What is the best clear coat to use over epoxy flakes on floors?
Answer:Before we answer the question, lets establish that there are 2 types of ‘flake floors’. The first one we call a ‘partial’ broadcast which is where there are flakes every few inches or so and the basecoat is highly visible. The second, is a “full Flake” system which is by far the most popular install done by contractors and pros. This floor has flakes covering 100 percent of the floor. When the flakes are covering the floor you need to use a higher solids coating to properly grout and fill all of the voids that are created by flake. Our Poly 90 is 90 percent solids and has been proven to be a great topcoat in this instance. It also dries quickly to return to service, has a low odor during installation, and is UV stable. This product is highly durable and is in the same family as truck bed liner so you know its tough. We have tons of everyday contractors that use this as part of their everyday business and they just coming back for more due to the ease of installation and the performance it provides for their customers. The Poly 90 can be used on either partial or full flake systems.
Question:What is the best way to apply Poly 90 over flakes?
Answer:Always squeegee and backroll over flake. Squeegee with a flat squeegee with 100 percent coverage as the goal. This properly grouts the flakes and makes sure you don’t get any dry spots. As soon as you squeegee the product out roll it with an 18″ 3/8″ nap roller as soon as possible so the product has the opportunity to lay out before it starts to set. Expect coverages of 150 to 200 sqft per gallon over full flake floors. This product can be put over partial flake floors too with the same methodology (you’ll get slightly better coverage rates)
Question:Can you pigment Poly 90?
Answer:Yes. We have pigments that will make Poly 90 a solid color. One pigment pack (Poly Pigment) will pigment up to 4 gallons of mixed Poly 90
Question: Is Poly 90 best in the bucket while installing or pour on the floor?
Answer: Poly 90 is best left in the bucket. In fact this is one of its great features is that it will hang out in the bucket unlike many Polyaspartics. Pour on the floor, flat squeegee and 3/8″ nap backroll as you go is the methodology. Once on the floor you have 5 to 15 minutes to work with it.
Question: Which pigment will make Poly 90 a solid color?
Answer: We have Poly Pigments
that can be added to make it a solid color. One of our quart size pigments will pigment up to 4 gallons of Poly 90 (or Poly 85 slow)
Question: Can Poly 90 be used as a basecoat?
Answer: Yes. Poly 90 can be used as a basecoat and topcoat. If your using it for a basecoat you need the “Poly” pigment (one does 4 gallons).
Question: Is Poly 90 more flexible than epoxy?
Answer: Poly 90 is much more flexible than epoxy allowing it to be more resistant to cracking and a good choice if you need to go over a wood substrate compared to epoxy. Epoxies get really hard, but this also limits their “flex”. Epoxies are generally used for base coats when you need a thicker floor, or the floor has a lot of surface damage.
Question: Can you apply Poly 90 outside?
Answer: This is an interior coating, but with that being said, we have had several contractors use this coating on exterior concrete and had great success. This product is UV stable. Coating outside can be trickier as you can’t control installation conditions as well.
Question: What conditions affect the application of poly 90?
Answer: Temperature and humidity affect the application of poly 90 greater than anything.
Question: What is the best way to clean Poly 90?
Answer: You never want to use an acidic cleaner, a PH neutral cleaner like our EZ Clean would work great!
Question: What mil thickness is ideal for poly 90?
Answer: Around 200 sqft per gallon as a basecoat and around 150-200 sqft per gallon over a full flake broadcast. This is around 6 to 9 mils.
Question: What is the preferred way to apply Poly 90?
Answer: Most contractors find that if you squeegee before you back roll Poly 90 it will give you a much better finish. We recommend our 24” flat flexible squeegee. Some dip and roll if you’re using it for a base coat, but always squeegee and back roll over flake.
Question: What do you do if you go outside of the recoat window of Poly 90?
Answer: The best way to recoat poly 90 if you are outside of the recoat window is to use a sanding screen. You will need a profile in your existing coating before you apply another coat. Use a 80-120 grit sanding screen. Dry clean the floor by blowing and using micro fibers to ensure any residual dust is off the floor before applying your next coat.
Question: Do you have to mix an entire kit of poly 90?
Answer: No, mix whatever amount is necessary for the size of the job. You just need to be on a 1 to 1 ratio.
Question: Can you recoat Poly 90 the same day?
Answer: Yes, Poly 90 has a recoat time of 2-18 hours. Recoating the same day will be greatly affected by the temperature and humidity.
Question: What is the shelf life of Poly 90?
Answer: If the product is kept in a temperature controlled environment, the shelf life should be one year. (In its original, sealed, unopened container)
Question: Can you use Poly 90 over caulk?
Answer: No, Poly 90 should only go over a more rigid material.
Question: What is the best way to put a decal on a Poly 90 Floor?
Answer: The best way is to simply coat your floor with Poly 90 and get a high quality sticker to apply to the top of your coating. Many decals are specifically made to go right on top of floors.
Question: What is the lowest average temperature you can apply Poly 90?
Answer: A good rule is to stay around 50℉ (floor temperature) when applying Poly 90. Poly 90 can be put down at lower temperatures but will take longer to dry and cure.
Question: Does motor oil hurt or affect poly 90?
Answer: Our Poly 90 is put down on tens of thousands of floors every year with fantastic protection from various chemicals. Motor oil is listed as “Recommended” on our technical data sheet’s chemical resistance chart. See Tech/Data Sheet for our chemical resistance page. Always clean up spills as quickly as possible.
Question: Can you apply Poly 90 on wood steps?
Answer: Yes, Poly 90 is designed for concrete but with good preparation, you should have great success. Sand and wipe clean before coating. It is very common for homeowners to want their garage steps coated.
Question: What is the best way to store opened unmixed Poly 90 to be used at a later date?
Answer: The most important factor to consider when storing open, unmixed, Poly 90 is to keep it temperature controlled. Do not let this product be exposed to very high or very low temperatures. Keeping this product sealed and at a consistent temperature will be the best way to save extra product that was not used.
Question: Can you apply Poly 90 over radiant heat?
Answer: Yes, we have had a lot of contractors that have had great success applying Poly 90 on a floor with radiant heat. Don’t have your heating system going when applying, it could cause fast and/or differential drying.
Question: Can you flake vertical surfaces using Poly 90?
Answer: Yes, the best way is to apply a very thin coat of pigmented Poly 90 on the vertical wall and then apply another coat of pigmented Poly 90 to make sure there is plenty of product on the vertical to hold the flake. Broadcast flake into second coat. Scrape flakes smooth when dry. Lastly, top coat with Poly 90 Clear.
Question: Does Poly 90 have a gloss finish?
Answer: Yes, Poly 90 has a very high gloss finish.

