22
Nov
How to Install an Epoxy Flake Floor: A Step-by-Step DIY Guide
Epoxy flake flooring is a durable and stylish option for garages, basements, workshops, commercial spaces, and many other situations where a seamless, easy-to-clean floor is appropriate. While professional installation is always an option, a DIY approach can be a rewarding and cost-effective way to upgrade your concrete floor. This guide provides a comprehensive step-by-step process, incorporating expert advice and tips to help you achieve professional-looking results.Step 1: Project Planning and Preparation
Before you begin, careful planning and preparation are essential for a successful epoxy flake floor installation.-
Assess Your Floor:
- Inspect the concrete: Examine the concrete surface for any cracks, damage, or signs of moisture. Address any issues before proceeding.
- Moisture check: Perform a moisture test to ensure the concrete is dry enough for epoxy application. Excessive moisture (moisture coming up through the floor) can lead to adhesion problems and floor failure. (We do have a special epoxy for these floors)
- Measure the area: Accurately measure the floor's square footage to determine the amount of epoxy, flakes, and other needed materials.
-
Choose Your Materials:
- Epoxy: Select a high-quality epoxy specifically designed for flooring applications. The most common epoxy for your basecoat is a 100 percent solids epoxy like our Epoxy Flow 100. This product gets rock hard and makes a great binder to throw flakes into. Epoxy is typically only used for a base coat anymore, as many use a polyaspartic for the topcoat, as it has more chemical resistance and is UV stable. Consider it a red flag if a company says to use epoxy for the topcoat.
- Flakes: Choose your desired flake size, color, and style. Consider the overall aesthetic you want to achieve and the level of traffic the floor will receive.
- Topcoat: The most common choice for a topcoat is a high-quality polyaspartic, as these have great chemical resistance, cure quickly, and are UV stable.
- Tools and equipment: Gather all necessary tools and safety equipment:
- Diamond grinder (for surface preparation)
- Rollers and spreaders (for epoxy and top coat application)
- Mixing buckets and drill with a mixing paddle (for epoxy preparation)
- Floor scraper (for knocking down flakes)
- Vacuum and blower (for cleaning)
- Epoxy Spiked Shoes (for epoxy flake application)
- Epoxy Flakes
- Safety glasses, gloves, and respirator (for protection)
- Poly 90 (for topcoat)
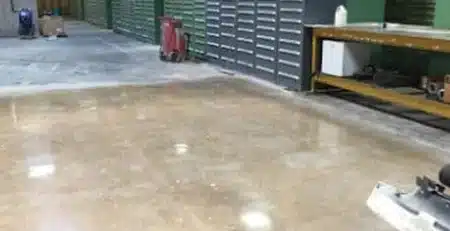
Step 2: Prepare the Concrete Surface
Proper surface preparation is crucial for achieving a durable, long-lasting epoxy flake floor.-
Clean and Repair:
- Remove existing coatings: If the concrete has any existing coatings (paint, sealers), remove them thoroughly using a grinder and vacuum system. Always grind dry. You do not want to add any moisture to your floor!
- Patch imperfections: Fill any cracks or imperfections with a concrete patching compound like Instant Medic Hard. Allow the patch to dry completely before proceeding, then grind flush with the floor.
-
Create a Profile:
- Grind the surface: A diamond grinder creates a textured surface profile. This is crucial for proper epoxy bonding.
- Alternative methods: If diamond grinding isn't feasible, consider bead/shot blasting. Never use muriatic acid as it doesn’t create the proper profile, adds water to the floor, and changes the ph. Professionals never use muriatic acid.
Step 3: Apply the Epoxy Base Coat
The base coat provides the foundation for the flake system and bonds the flakes to the concrete.-
Mix the Epoxy:
- Proper mixing: We recommend using Epoxy Flow 100. You’ll combine resin and hardener. (2a:1b). Always read data sheets before using the product.
- Pigment: You always want to pigment your epoxy for flake applications so you can never see the concrete floor below. Most often, you use a tan color (sun buff) for ‘tan’ type flakes and medium grey for greyer type flakes. One of our epoxy pigments will pigment 3 gallons of epoxy. It's easy to add this to the epoxy after you have your mix ratio and have just started mixing.
- Use a drill mixer: Use a drill with a mixing paddle to thoroughly blend the epoxy components. Mix for at least 2 minutes, making sure to get the top, bottom, and sides of the bucket. Do not shorten the mixing step, and never use a stir stick!
- Working time: Be mindful of the epoxy's working time (the time you must apply it before it starts to harden) and pot life (the time it remains workable in the mixing container). With Epoxy Flow 100 you will pour onto the concrete immediately after mixing as it will expedite its set in the bucket.
-
Apply the Epoxy:
- Even application: Use a notched squeegee to spread the epoxy at around 100 sqft/gallon—Backroll immediately after with an 18”, ⅜” nap roller cover.
- Coverage: Ensure adequate coverage according to the manufacturer's recommendations.
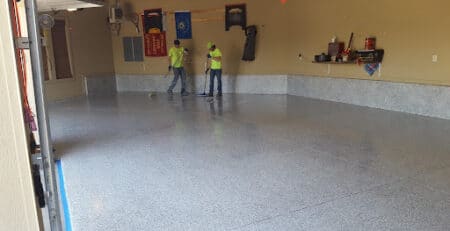
Step 4: Broadcast the Flakes
This step adds decorative and functional elements to your epoxy floor. It is recommended to broadcast to rejection (full flake).-
Apply the Flakes:
- Broadcasting techniques:
- Hand broadcasting: This is the most common method. Position yourself at the back of the project area and work your way towards the front. Grab a handful of flakes and toss them upward and outward from about shoulder height, allowing them to fall randomly onto the wet epoxy. Overlap each toss slightly to ensure complete coverage. Apply flakes to rejection.
- Even distribution: Aim for even distribution and your desired flake density and pattern. Multiple light broadcasts are recommended until the floor is fully saturated with flakes. Do not leave shiny spots on the floor.
- Flake Quantity: A general rule of thumb is to use 12% of the floor square footage in pounds of flakes (e.g., a 600 sq. ft. floor would need 72 lbs of flakes).
- Final check: Always look at your floor about half an hour after you broadcast the flake to ensure flakes didn’t sink into the epoxy, leaving a bald spot. This can be quickly done by walking on the floor carefully in spiked shoes and rebroadcasting any areas you see.
- Hand broadcasting: This is the most common method. Position yourself at the back of the project area and work your way towards the front. Grab a handful of flakes and toss them upward and outward from about shoulder height, allowing them to fall randomly onto the wet epoxy. Overlap each toss slightly to ensure complete coverage. Apply flakes to rejection.
- Broadcasting techniques:
-
Scraping flakes:
- Scraping epoxy flakes: Use a flat floor scraper to smooth the flakes after the floor has dried enough for light foot traffic (generally around 12 hours but can fluctuate based upon temperature and thickness). Vacuum and leaf blow all scraped flakes so the surface is clean for the topcoat. This is a very important step, as you don’t want to leave any flakes high or vertical, as this could cause a rough floor and additional topcoats.
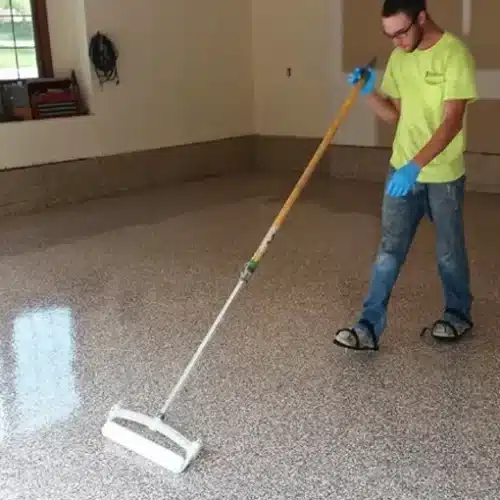
Step 5: Apply the Top Coat
The top coat seals the flakes, provides a durable finish, and enhances the floor's appearance.-
Choose a Top Coat:
- Types of top coats: With today's technology, the go-to topcoat is a polyaspartic. The reason for choosing polyaspartic for a topcoat is that it has great chemical resistance and is UV stable. Not all polyaspartics are equal. Some have a very high odor, and others have found a way to call themselves something they really aren’t. We recommend Poly 90, as many contractors use it for daily operations with great results. Poly 85 Slow is another option if you would like more time to work with the product on the floor.
-
Apply the Top Coat:
- Squeegee and backroll: Use a flat flexible squeegee to apply the top coat evenly (around 175 sqft per gallon with ¼” flake; smaller flake will take more), ensuring a smooth and consistent finish. Immediately run an 18”, ⅜” nap roller cover through the product to help it even out. Don’t overroll this product. If you need more time, have a limited crew, or are doing a larger space, try the Poly 85 Slow.
- Grip additive: Depending on the desired finish, you may want to add a grip additive. This would be recommended in a place like a garage but considered an option in a commercial hallway or retail store. For a garage or area that is more prone to wetness, our Monkey grip is the typical choice (40 mesh size). This can be mixed in the topcoat. Note: Always test an area to determine the grip you like for your project. There is no hard and fast rule as people have their own desires.
Step 6: Curing and Maintenance
Allowing proper curing time and implementing regular maintenance will ensure the longevity of your epoxy flake floor.-
Curing Time:
- Full cure: Allow the floor to cure entirely according to the manufacturer's instructions. This typically takes several days to a week.
- Factors affecting curing: Temperature and humidity can affect curing time.
-
Long-Term Care:
- Regular cleaning: Clean the floor regularly with a pH-neutral cleaner and a soft mop.
- Avoid harsh chemicals: Do not use harsh chemicals or abrasive cleaners that can damage the finish.
- Prevent damage: Use mats in high-traffic areas to prevent wear and tear and avoid dragging heavy objects across the floor.