16
Aug
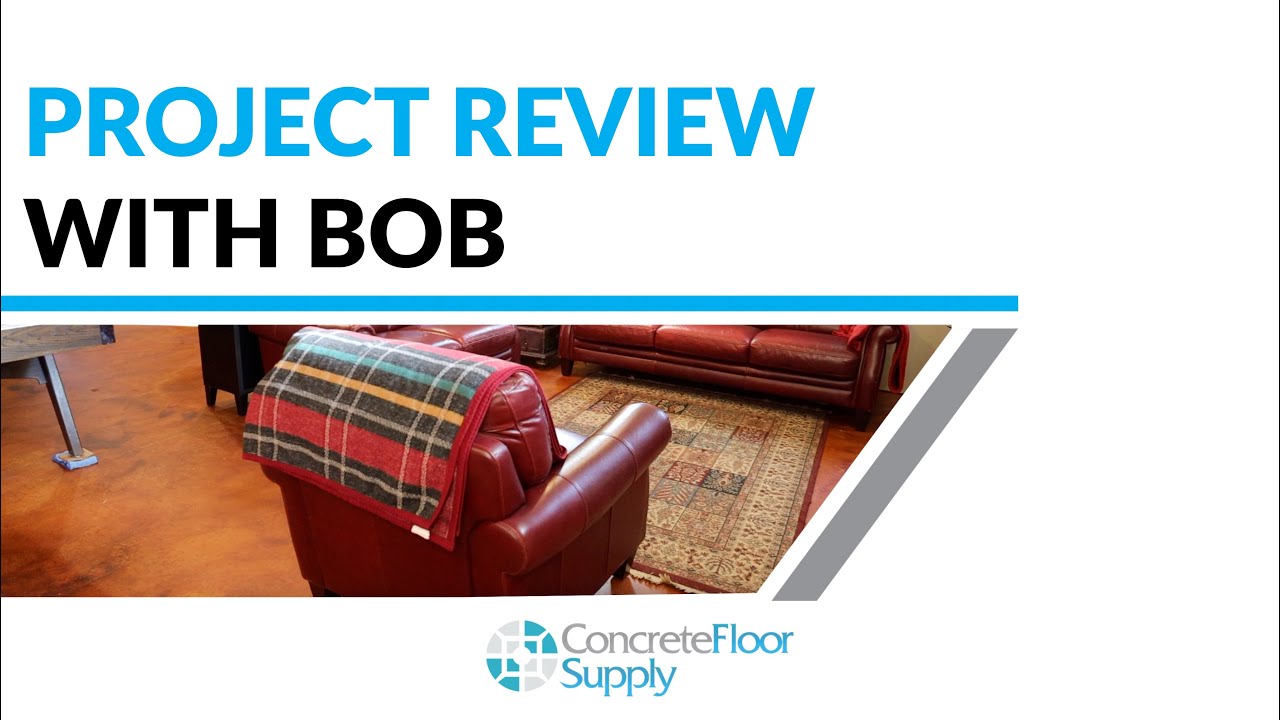
DIY Concrete Floor Staining: A Success Story with Water-Based Stains
TLDR: This transcript captures a conversation between Chad and Bob about Bob's successful DIY concrete floor staining project. They discuss the benefits of water-based stains (like achieving a marbled look), the critical role of proper floor preparation using satellite pads, and the importance of choosing durable two-component sealers for long-lasting results. They emphasize that with the right system and guidance, even non-professionals can achieve professional-quality concrete floors.
Full Transcript
Bob: When you suggested the water-based thing, yeah, I was in the low VOCs. I was like, oh, that sounds like something I would rather do. And just knowing you and having you as my mentor to help coach me through made me feel a little bit more confident. And just following your process and, you know, prepping the floor with the buffer and cleaning it properly, and then staining and using the primer, yeah, and the polyurethane, and it was a step-by-step process and kind of just followed, um, how you outlined it, not only on your website but, um, in some of the print materials and yeah, just conversations we had. But, uh, um, you know, we were able to do it and surprisingly, it turned out pretty good. So I was very happy.
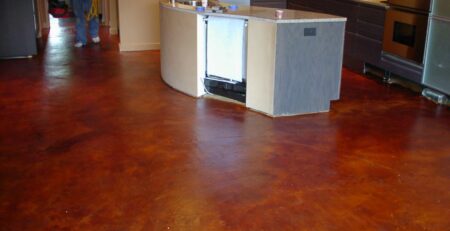
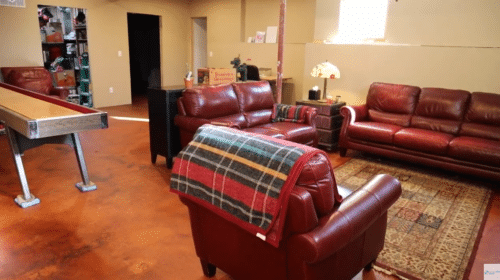
Chad: I'm happy to see it, you know, and luckily, you know, we were right down the road, and I do happen to know you through other things, so it's cool. And we can't always do that because we've got customers that are, you know, on the other coast or wherever, and we ship them things. So that was neat to see. But, you know, I also let people know too, and you had a couple quick questions that you're not alone, yeah, when you do this. We try to give people instructions and try to give people some videos and some things, but everybody always has a question, and it's no big deal, and we're like, just call us, yeah, you know, we'll answer your question. And typically they're very easy type things, and you had a couple of those, and everything really turned out neat. You know, the other thing that you talked about that was interesting, um, I'm a fan of the water-based stain myself because a lot of people on a stained concrete floor, they want that marbling type look and that two tone and the high and low. Yeah. And you really accomplished that on this floor. And then when I got here, because I gave you a highlight, a little highlight color, and I said, hey, you just, and you've got the darker areas, but you didn't even use it. You just, you just, it's the way that you sprayed it, and I thought it was cool that you used the Wagner sprayer. A lot of people, I like to pump spray and microfiber, yeah, yeah, but then you just kind of went out on your own which I'm like, well, that's cool because you know, it's there's not really hard and fast rules, don't overthink it and you use that Wagner and did that and created the high and low.
Bob: Um, well, I watched your YouTube, uh, channel, uh, went to your website and watched videos there too, but also looked at the catalog and, you know, read as much as I could. So I understood the process. But, um, I, I, I'm an artist is my profession. Yeah. And so I guess maybe some of my artistic, uh, tendencies came out in me in, in how I finished the floor, um, and was able to sort of almost paint with the sprayer, yeah, which was kind of fun.
Chad: Now, let me ask you, because I only saw the video clip, and you kind of shot me a text and said, Hey, check it out. Now, did you just do one spray coat or did you kind of come back and layer it?
Bob: Yeah, I did layer it. Okay. I, ,I and I did a circular motion with my sprayer. Okay. And then I let it dry, and it was kind of light, and it wasn't quite the, uh, darkness that I was trying to achieve. And so, um, I did another layer and, and then I let it dry and then I went back and I actually, there were a couple places where the stain sort of puddled and I sanded those down and then sprayed it again.
Chad: Gotcha. Yeah.
Bob: And then I kept, I kept going back and forth until I really got the right texture and pattern, and I liked some of the imperfections that were in the concrete that it, that made it look more like marble, if you will. Yeah. And adding the dark and light areas just helps make it look more natural or real, I guess.
Chad: Yeah. And it doesn't have to be perfect. I, I don't think it has to be like perfect, and I think that's what's made it look good. Yeah. Yeah, yeah. You know, and the other thing that you brought up, though, is kind of interesting. A lot of people want the acid stain. We actually sell it. We sell a lot of the acid stain and ship it all over every day, and they typically want it to get this two-tone, you know, effect. And for years I've wanted to call the product and rename it and call it on acid because when you put it down, you're, you're on acid, you don't know what you get, which is kind of cool. But sometimes, I know you came to me and you said, Chad, I kind of want this, this reddish type color. Yeah. And the neat thing about the water-based stains, to me, is if that's the color you want, you can dial it in a little bit closer. With an acid stain, you kind of put it down, you get what you get. And with these water-based, you have a lot more color control, and like you did, it's just not quite dark enough or whatever. Bam, you can go back and put on another layer. Yeah. Acid stains don't work like that, and they're a lot more labor-intensive because you got to clean up that residue again. It's kind of a preference thing, yeah, but it amazes me what you did, you know, with a water-based stain. A lot of people think that they're more of a solid color and they get beard like that. And the big box stores are they're stains because they're more paint, right? You know, and this is actually a semi-transparent stain, and it's this, this was cola. Yeah.
Bob: And then I, uh, primered it and then we polyurethaned it with a matte finish. Yeah. And, uh, it really was exactly what we were hoping for.
Chad: Yeah. You know, the funny thing is, and I talk about it all the time because a lot of people, they'll call or they're, they'll ask us about stains and it, it may seem kind of funny, but the least of my concern is the stain typically, you know, and it's, it's usually the beginning and the end. In the beginning being the prep [Link to: Surface Preparation category], you know, and you prepped it with that, uh, satellite pad, the 30 grit satellite pad [Link to: Diamond Abrasive Pads], right? And you had some paint and sheet rock mud and things like that and it just annihilated. You showed me some of the pictures, and you know, so you got good prep. Prep is so key, you know, and really it's not that hard. I know you used a low-speed buffer [Link to: Low-Speed Buffers/Rental Info] and it took you, you know, a little bit. I kind of say it's like riding a bike. I mean, once you get it figured out, yeah, it's headphone work and you're just hanging out, right? But, um, the hardest part is figuring out how to turn it on. Yeah.
Bob: For me, because it has a safety. Yeah. And then you have to sort of hold that and turn it on. Yeah. But then once it goes, then you have to be ready because it's good, it's going, it has some torque.
Chad: It does have some, so you got to really hold it. You kind of have to hold it right here towards the hips. Yeah. Um, and I always tell people start it out in the middle of your floor because they do, they have a little bit of torque to them and you could be a sheet rocker before you know it, right? But, you know the, the neat thing about those is there's a lot of people that, you know, they don't know where to get prep things and all of that. We've made it so easy, and it's just a diamond pad. Diamonds all the way through the pad, 30 grit diamonds and it creates, I call it grandma's hair. You know, it creates that grandma's hairline scratched throughout your whole floor. So you get good sealer penetration like you did, yeah, and then good bite with your top coats, right? And the alternative for that, um, you know, you got to rent this big grinder and get it down here and go through the expense. Whereas we can just get you a pad and then the low speed buffer, yeah, they're really available for rent at nearly any rental store. And, uh, you do want to use a low speed and as opposed to a high. Low speeds are 175 RPM. Yeah. But, um, and you add, add a little bit of water that, yeah, sort of lubricate it and get it.
Bob: Yeah. And we had whoever had the house before, they spray painted in one of the rooms, and it was like this green line of spray paint.
Chad: Very typical. Yeah.
Bob: It just, it just took it off. It was, I couldn't, yeah, how easy it took it off. It was fantastic. And then, of course, there was Sheetrock mud and all kinds of little weird things that it just took off with. Yeah, no problem at all.
Chad: You know what I wish? I wish I could see everybody's face when they run the pad because we get the question, you know, about the sheetrock mud and the paint and everything. I'm like, don't worry about it. It's going to take care of it. Now, if you have a bunch of built-on paint, we have a product called snot that helps break that down and remove it. You really didn't have that. You just had, you know, some spray paint right here and there and sheet rock mud. But I wish I could see people's face when they put the pad on and they run it and like, oh, it is easy to get rid of. It's not, it's really not that big of a deal. Right. Right.
Bob: Well, yeah. And I hadn't mentioned this to you, but after we did the floor, we did a little, uh, painting of the, uh, towards the ceiling, uh, cutting in. And there were a couple small little paint drops that fell on this flower on the floor when it was completed and I thought, oh my god, what about what have we just done?
Chad: Oh, really? After you urethaned it? Really?
Bob: And so, um, I can't remember. My wife looked it up, but she said, you know, we took some acetone and we just rubbed right where it was and it came right off. Yeah. And yeah, seemed to be perfectly fine. I hope that was okay. Um,
Chad: Well, yeah, probably for just a little touch. Now, acetone is a reducer for me. So if you just kind of want to wipe with it and let it go away, yeah, yeah, that's not a bad thing to do. But you've got to be a little bit careful of that stuff because it's so strong. Yeah. You know, try water first, you know, yeah. But, uh, you know, that's the other point. Now, the other part of this, we talked about the beginning with the pads. You know, the other exciting part for me is the end because I see in our industry, I feel too often that people use sealers [Link to: Concrete Sealers product category] that they just don't hold up. Typically that's a single component acrylic and you can get them anywhere. You can get them Home Depot and these big box stores and whatnot. And we sell them. We have a couple. They're just a budget-type sealer. Yeah. We tend to push people towards something that you're going to get a little bit more durability out of like you used. And in your case, you used a water-based epoxy primer and then waited for that to dry with a two-component 101. Yeah. And then you put our matte finish urethane on. That's a two to one product. Simply mix and then you roll it on like any other sealer. Right. But I love that because you're going to get great durability out of the floor as opposed to the single-component acrylics. Um, I kind of compared the acrylics and they kind of are like house paint in a way. In house paint, you know, it's, it's not meant for abuse of of traffic. You know, it's meant for more flexibility. And a lot of the acrylic sealers are good outside and like maybe a stamped concrete patio. But for your traffic, where you're best for the urethane, um, you know, you spill wine or things like that or just scratching and scuffing. So that is, that's cool that you put down a good, um, top coat on it.
Bob: Yeah. And we, we did the bathroom and what we were calling the bedroom first because, uh, we, we had to do it in stages. And then we did this main living room area and we, we probably waited a good week before we moved into the bathroom in the bedroom. But the main living room here, we probably waited two and a half days. Yeah. I probably should have waited more. Yeah. You know, yeah. Uh, because I know you said probably for it to really cure, how many days do you think?
Chad: Well, you know, any two component product is generally seven days. And you know, the data sheets are always on our website because we get this, you know, all the time like how long to wait? Just refer back to the website because each product is going to have a little bit different cure rate. Right. In fact, I mean, we sell a lot to, you know, this happens to be a residential project. Yeah. But we sell a lot in the commercial field as well. And the neat thing for me is that it's a complete system. You know, yeah. And a good system because it seems, and I was, I guess if you want to call it guilty of it, you know, like it at the young age when we first started doing these is figuring out what's the good sealer and what's and then we put it all together. Yeah. You know, yeah. Because most people they don't have time and they don't want to try to figure out to put it together and we've really done that and spent years to do it and not only that, giving people, I guess, the Betty Crocker type instructions where it's one, two, three. And um, so you know, that you've got a good system. You know, and that's what was important to us when we put this together is take those years experience, what is a good system? I used to do these to make money. I had to perform to do these. So basically what we did is took some of these things and made them into a system that others could do. Right. You know, right. So it's neat for me to see this, Bob, it really is and know that somebody did it that they don't do it every day, you know, and uh,
Bob: No, it was easy. Um, you know, I followed the instructions. Um, and I just did it step by step, follow the process. Um, it wasn't really difficult. Uh, probably the hardest part was just being patient. Yeah. Yeah. Um, but, but, um, I followed the process and, uh, it turned out fantastic. So thank you.
Chad: Yeah, yeah, no problem. And you know, the other thing, it turns out fast, fantastic and then it'll perform too. You know, and performance is, you know, key to us. I mean, we, we don't like to, we like to deal with higher quality products and make sure that people they can put something down that's going to perform for them over time too. So that's good to know. But it was great for you to have me here. I was excited to see it and actually it looked better in person than the pictures. You were shooting me some pictures and it looks better in person and you got some furniture in here and I always tell people too, and maybe it's a funny thing, but the floor is naked when you're done and then, you know, you get done with your floors completely naked. You got some furniture in here and I mean, it really came together nice. So yeah. Yeah. Well, thanks, Bob. Thanks for you going to me.